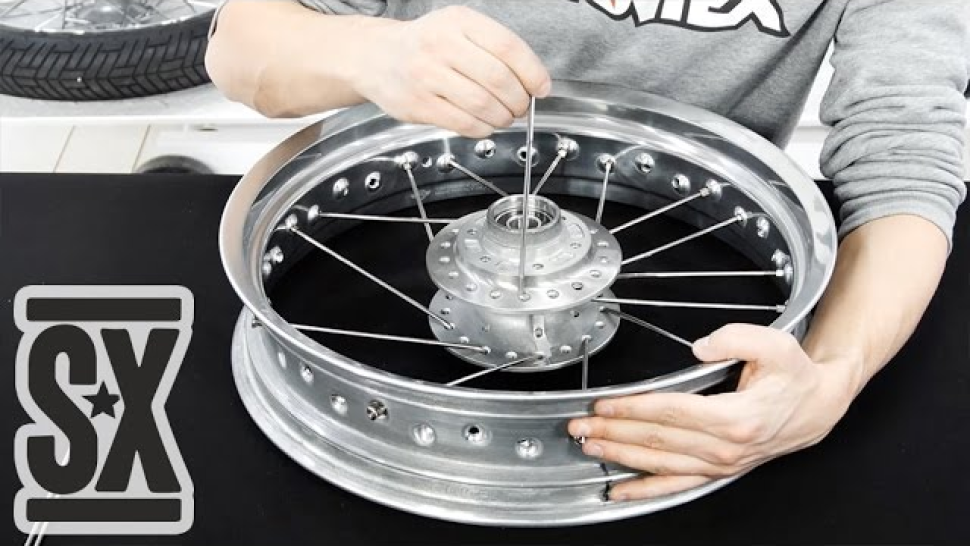
Front Wheel Spoke Lacing
On a real caferacer, ideally, there should be 17-inch wheels for the wide 120/70 sports tires, which allows to go into a slope easily. We assemble front wheels on the Yamaha SR500 hub, because it has seating positions for two brake discs. The rim is Italian and it was a special order from LSL for sports tires. LSL also supplies spokes and valves with a rim.
To assemble the wheel, we need a high-quality wrench for tightening the spokes, and a balancing stand. This kit is laced in a non-classical way, so before assembling we highly recommend you to carefully watch the video. Valves fit very tightly into the holes of the rim; this greatly complicates the assembly procedure: in the second row of spokes, the hub is almost stationary. We recommend to cover the wheel with the tape to prevent damaging the rim.
After assembling, it is better to cover all the spokes looking to the thread. It makes no sense to focus on the effort, because it can be created not by stretching the spokes, but by the fact that the valve is tightly inserted into the rim hole. After the covering, the wheel is balanced by radial (the center of the hub does not match the center of the rim), butt beats (figure eight) and a hood.
Radial beats
At first, all the spokes should be covered several times - this is usually enough to avoid a radial runout. It is important to check the tension of the spokes. If there is a radial runout, in some areas the spokes will be too tightened or loosened.
If the valves hardly go into the holes of the rim, then after they are all set, it is better to loosen all the spokes and cover it again. This needs to be done because the valve tension can be created not by the spokes tension, but by the friction of the valve with the rim.
Hood
When covering the wheel, it is also necessary to control the offset of the hub relative to the rim along the axel of the wheel so that there is no hood. Such an offset is measured by an hood meter. We do not have it, so we measured the distance between the rim and the seat of the brake disc with a ruler. If the spokes are covered evenly and slowly, then there can be no displacement. You can correct the offset on the already installed wheel, if it is not in the center of the fork.
Butt beats
Butt beat is much more difficult to eliminate. We showed in the video the basic principle of correcting it, but it may not be enough. According to the manual, the permissible beat is 1 mm. It is difficult to give any advice for balancing, but based on our experiece:
- It is better not to cover the spokes too much. When correcting the curvature, some spokes have to be loosened, and some need to be tightened. It is better to loosen than to tighten.
- It is better not to do more than one turn of the valve. If any valve is overtightened or weakened, it will pull the next ones.
- The wrench for the valves must be of high quality. You need to twist valves more than a dozen times. Low quality wrench can damage the sides.
- You must be as careful as possible. Do not rush. It is better to rest longer, than to try to do everything at one attempt.
- Don't forget to check the tension of all the spokes from time to time.
We spent the whole day for the balancing, and the shooting. To do everything on the camera is much more difficult. We noticed that the rim in the area of the weld is already 1 mm. When assessing the balancing quality, this deformation must be taken into account: it gives a short beating on each lap.
If you decide to assemble and balance the wheel yourself, here are some tips that will help you:
- Protect the rim with a tape or thin film
- Rest more than work
- Do not be afraid to loosen the spokes and re-start covering
We also have to go through the rear wheel, don't miss an article and video about it!


